April 18, 2013

Dark Chocolate Bundt Cake with Brown Butter Vanilla Icing


Bundt cakes were the vehicle for my girlhood underage rum consumption. My mom’s technique for her rum Bundt went something like: pour a few glugs of rum into boxed yellow cake batter, bake, drench warm cake with more rum, cut into thick hunks, cover with whipped cream, serve. It was, obviously, delicious. In this case, “Just like mom used to make” is really only true when mom does make it, but that doesn’t mean that the Bundt is sitting on the sidelines of my kitchen. While once naught but a booze chute, the Bundt is today one of my favorite baking blank checks—a fun way to innovate and always nab a winner.

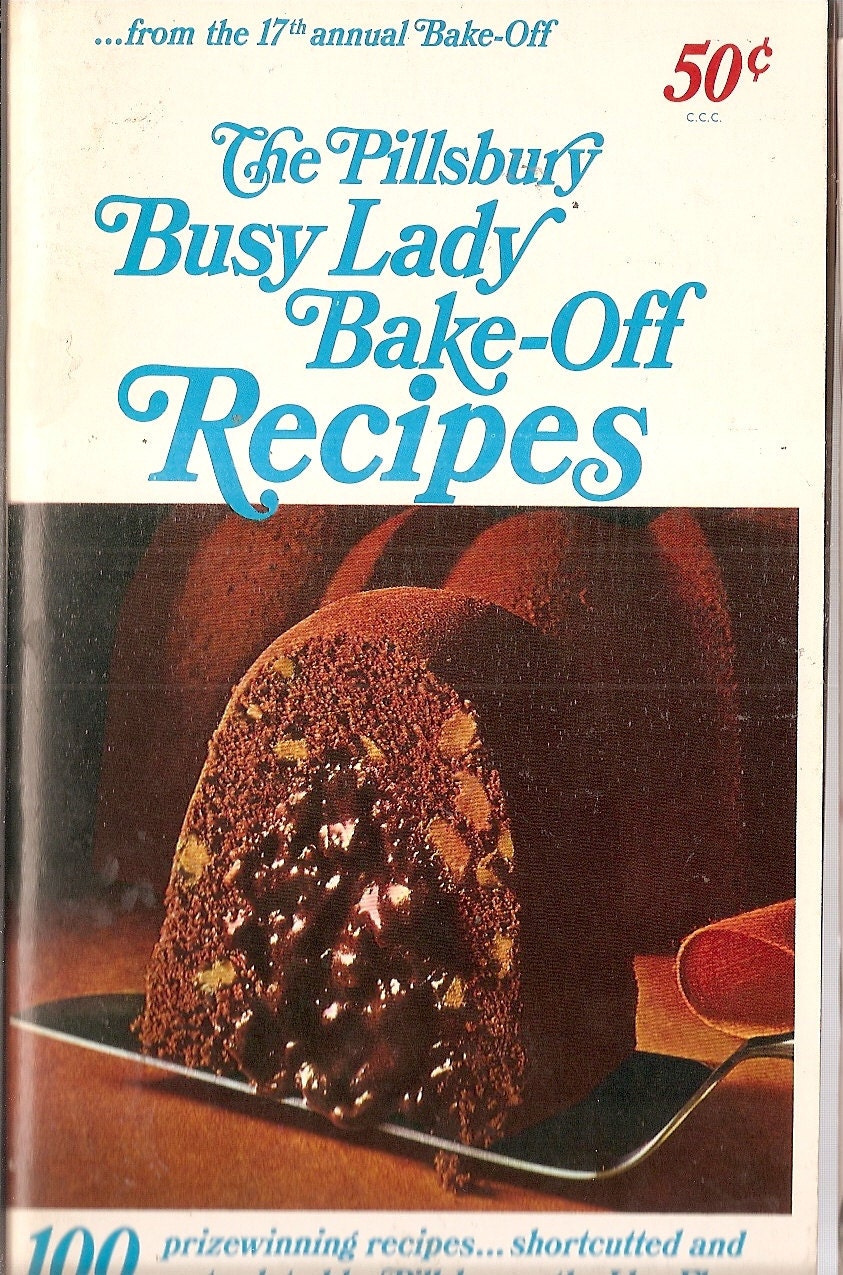
In the U.S., the Bundt first rose to popularity in the mid ‘60s after Ella Rita Helfrich used the then-obscure mold to win second place in the Pillsbury Busy Lady Bake-Off. Oozing with a gooey, chocolaty center—thanks to the addition of prepackaged Pillsbury fudge that sunk into the cake’s middle during baking—Helfrich’s “Tunnel of Fudge” cake was a national sensation that ignited a countrywide Bundt cake trend, but it had taken the pan a long time to ascend the kitchen ranks.

Derived from the beloved German Kugelhopf—an airy tunnel cake much in the way of brioche—the American Bundt pan had been in circulation in the U.S. since the early 1950s, but it remained largely anonymous until its 1966 moment in the sun. More than a decade prior, at the behest of his neighbors seeking to recreate their favorite childhood German coffee cake, budding entrepreneur H. David Dalquist had set about reinterpreting the heavy German Kugelhopf mold into the curved, aluminum pan we know today. In collaboration with his wife, Dorothy, Dalquist perfected his creation and dubbed it the Bundt, derived from “Bundkuchen,” or what the almighty Kugelhopf was known as in Northern Germany; “Bund,” the German word for “bundle,” refers to how the cake batter bundles around the hole in the center of the pan.

While the pan took its sweet time getting popular, it became so intensely well known after Helfrich’s success that it was eventually inducted into the Smithsonian as a hallmark of American food technology. And to this day, Nordic Ware—Dalquist’s Minnesota-based company that owns the Bundt trademark—has sold more than 60 million of its signature pans.

Even so, to many the Bundt might seem like a relic that’s too retro to be good—more in the way of bridge luncheons and church potlucks; people used the pan to bake meatloaf and serve potato salad, after all. But the Bundt cake itself is tough to argue with: easy elegance, crisped edges, tender guts, pretty much always makeable by hand instead of mixer, and it’s as suited to a thick icing as to a dusting of powdered sugar or a swath of salted butter. Versatile, in other words. The Bundt is even undergoing a bit of a revival these days, thanks to the efforts of folks like Matt Lewis and Renato Poliafito, the creative gentlemen behind Baked NYC and the classic National Baking Society. From their famous root beer Bundt to the modified Mary Todd Lincoln cake, Lewis and Poliafito are showing us that the Bundt is just as enduring of a canvas as any—trendy without being a novelty, and certainly not stodgy. And one of the best parts? Eating a slice from hand is totally permissible and satisfying, be it brown-butter-frosted, rum-soaked, or otherwise. Just don’t tell my mom. 


Bundt cakes, previously: old-fashioned gingerbread, applesauce with caramel glaze, maple chocolate stout, and carrot-date with cream cheese icing.

Dark Chocolate Bundt Cake
Adapted from the National Baking Society

According to my numba-one critic/fan, this cake taste like a "fancy Oreo"—he's basically right. Deeply chocolaty, the cake is super tender and yum, with a hyper-vanilla frosting that gets extra oomph from the brown butter. It's just the ticket for giving the Bundt cake its proper due.

2 ounces dark chocolate, chopped
2 teaspoons super finely ground coffee
3/4 cup boiling water
1 cup granulated sugar
1 cup dark brown sugar, packed
1 3/4 cups flour
3/4 cup cocoa powder, non-Dutch preferred
2 teaspoons baking soda
1 teaspoon baking powder
3/4 teaspoon fine-grain sea salt
1 cup buttermilk (or 1 cup whole milk mixed with 1 tablespoon white vinegar)
2 large eggs
1 teaspoon vanilla extract
1/2 cup safflower oil

1. Preheat oven to 350 degrees. Grease a ten-cup Bundt pan with some butter and dust with cocoa powder (in place of flour! This prevents the dark chocolate cake from having white streaks on the exterior once baked).

2. Put chocolate and coffee granules in a heatproof bowl, add boiling water. Let stand for two minutes, then whisk until chocolate is melted and mixture is uniform. Set aside. In a medium bowl, whisk both sugars in a medium bowl. Sift flour, cocoa powder, baking soda, baking powder, and salt over the sugars. Stir mixture to combine, making sure that brown sugar doesn’t end up clumping.

3. Using a whisk and large bowl, mix buttermilk, eggs, extract, oil, and melted chocolate until combined. Add the dry ingredients in two parts and mix until each part is incorporated. Scrape down the sides and bottom of the bowl and whisk briskly by hand for about three minutes, until batter is somewhat airy and totally uniform. Pour into the prepared pan and bake for 40 to 50 minutes, or until cake tester inserted in the center of the cake comes out clean (mine was finished at exactly 45). Cool for 15 minutes then invert onto wire rack. Cool completely before icing.

Brown Butter Vanilla Icing
4 tablespoons unsalted butter
1 tablespoon vanilla extract
4 to 5 tablespoons milk
2 cups powdered sugar, sifted
Generous pinch of salt

1. In a medium saucepan, melt the butter over medium heat until foamy. Stir every now and then for about five minutes until butter turns brown and smells nutty. You can let this get really dark if you want, but a sort of toasted brown will bring out a nice flavor. Remove butter from heat, add vanilla extract, sugar, and salt, and whisk until smooth. Whisk in the milk a few tablespoons at a time, until it’s a thick, but pourable consistency. If needed, add more milk one tablespoon at a time.

2. Set cake on a stand or on a rack over wax paper, and pour icing along the top, allowing it to flow down evenly. If it’s super thick, you might need to use a knife or spatula to nudge it down the sides a bit. Cake will keep, covered, for several days.

April 15, 2013

Cinnamon and Sugar Brioche Doughnuts + Rhubarb Ginger Jam


On the subject of the Down East breakfast, Maine poet and professor Robert P. T. Coffin wrote in 1949 that “weather, mother of good poetry, is also mother of good breakfasts.” The bitter cold necessitated the bulletproof morning meals that helped farmers and fishermen sustain themselves through the day so that they never “blew away.” It was a six- or seven-part spread, overwhelmed by chunks of salt pork and sandwiched by red-hot, scalding tea—“the whisky of the north”—that put “whiskers on the soles of your feet.” A proper breakfast must, he repeated, “stay put and generate heat. It must have rich, fattened, and oiled doughnuts to it, heavy pies, and pancakes, to keep the stomach busy, to keep the blood away from a man’s brain, where it can only do mischief, to keep his blood in his arms and thighs where a good woodchopper’s or smelt-fisherman’s blood belongs...The Maine breakfast is a hefty meal for hefty he-men.”*


Pronoun troubles aside, Coffin was right: big, rib-sticking breakfasts are a staple up here. Even at dawn, everything tastes better with links of maple sausage on the side, and a hunk of toast with butter-fried eggs is never far behind. We don't wrap our breakfasts in seven flapjacks, eat sinewy, jellied hog’s-head cheese, or chase the meal with five quarters of sweet pie, as Coffin contends that strong Maine farmers do, but we do cook up great big pans of hash browns, drink steins of bitter black coffee, and fry handfuls of “fattened” doughnuts rather often. The weather is responsible? Then so be it.

Whether you're Down East or not, don’t miss out on either this jam or these doughnuts. The jam, now one of my favorites ever made or eaten—what genius first put ginger with rhubarb anyway!?—is a cheery complement to these ludicrously buttery but barely sweetened brioche doughnuts. I shook them in cinnamon and sugar to add an extra element of warmth, but plain old-fashioned or a dusting of cardamom wouldn’t be at all out of place. We ended up having them with sausage, granola, and yogurt, so not quite Coffin’s lumberjack and lobsterman prescription, but certainly a mighty-fine and rightly affirming way to start the day.


And a quick note to thank everyone for the kind feedback on last week’s baby goat midwife post! I've sneaked in a few photos of them enjoying their own Down East breakfast below.

Brioche Doughnuts
Adapted from Karen DeMasco, The Craft of Baking
Makes about 12 doughnuts and 20 holes

Doughnuts, previously: Another Karen DeMasco classic.

This is the most buttery doughnut dough I've ever used, and it has a super excellent flavor. To make the frying process as smooth as can be, have your cooking station set up before you fry: timer, paper towels, cinnamon-sugar bowl, and serving tray.

2 1/2 cups high-gluten bread flour
1/4 cup granulated sugar
1 tablespoon Kosher salt (I used Diamond; use less if using Morton)
2 1/4 teaspoons (1/4 ounce or 1 packet) active dry yeast
6 large eggs
3 sticks (12 ounces) unsalted butter, chilled and cut into one-inch pieces
Peanut oil for frying
1/2 cup granulated sugar + 1 teaspoon cinnamon + pinch salt for tossing, optional

1. Sift flour, sugar, and salt into the bowl of a stand mixer fitted with the dough hook attachment. Mix a few times to blend.

2. Set a saucepan of water to boil on the stove. In a heat-proof bowl, whisk the six eggs with the yeast, and place over the boiling water, whisking continuously for about a minute, or until the eggs are just warm to the touch. Add the egg-yeast mixture to the flour bowl, and mix on medium for about four minutes, until the mixture starts to resemble more of a dough.

3. With the mixer still running, add the pieces of butter quickly, but one at a time, then allow machine to run until no visible pieces of butter remain. (This took our old-ish mixer about eight minutes.) Turn dough out onto a lightly floured counter, and knead for about five minutes, until dough is tighter. A word of caution that the dough will be very sticky and loose. Try to resist the temptation to add more flour.

4. Place dough in a clean, well-oiled bowl, cover with plastic or a damp dishtowel and allow to rise for two hours. Fold the dough over itself, cover again, and allow to rise in the fridge at least six hours or overnight.

5. The next morning, toss dough out onto a lightly floured surface, and roll into a rectangle about three-fourths of an inch thick. Using a three-inch round and one-inch center, cut doughnuts out of the dough; cut holes out of remaining dough, and do not reroll scraps. Place cut doughnuts on cookie sheet or cutting board lined with parchment, cover, and allow to puff up over the next 30 minutes.

6. In a wide, shallow pan, heat peanut oil to 350 degrees F; do your best to maintain this oil temperature throughout. Cook one test doughnut about 1.5 minutes per side, then drain on paper towels. Cut it open to ensure the center is cooked, and adjust your fry time accordingly; it works well to fry three at a time. Doughnut holes take about a minute to cook through; it worked fine to fry five or six at a time. Blot the doughnuts and toss in the cinnamon-sugar mixture while they're still warm. Serve with a few spoonfuls of rhubarb-ginger jam. Doughnuts are best the morning they’re made!

Rhubarb + Ginger Jam
Makes about a pint

Good on toast, great in yogurt, mighty-fine served alongside a doughnut. What's not to love?!

1 pound rhubarb stalks (pink if you got ‘em)
1 to 1 1/4 cups granulated sugar
2-inch knob of ginger, peeled and grated (about two heaping tablespoons)
Zest and juice of half a lemon

1. Trim the rhubarb and chop it into one-inch pieces. In a medium bowl, toss rhubarb with the lesser amount of sugar, grated ginger, and lemon juice and zest. Let sit for at least two hours, stirring two or three times, until rhubarb has let off its juices; you can also cover and let the rhubarb do its thing in the fridge overnight. Ultimately, the mixture should get really juicy.

2. Pour the rhubarb mixture and juices into a medium saucepan. Bring to boil to and stir to dissolve the sugar, then allow to rapid-boil for about 15 minutes; the stalks will completely break down and the mixture will thicken up quite a bit. Keep an eye on it though so as not to burn. Taste, and if you prefer a slightly sweeter jam, add the remaining quarter-cup sugar and stir to dissolve. Remove jam from heat and allow to cool—it will thicken as it does—or fill sterilized jars and process accordingly. We just filled one big ol’ jar and are keeping it in the fridge instead of storing.

*Robert P. Coffin, "Down East Breakfast," in Endless Feasts, ed. Ruth Reichl (New York: Condé Nast Publications Inc., 2002), 123–129.

April 10, 2013

Call the Baby Goat Midwife!


At the moment, I am a baby goat midwife and cuddle puddle collaborator in Maine. My main job on the farm is to be at the birthing ready while Dave and Jen “catch” the baby goats and free them from their newborn slime, then I rub, rub, rub their backs until the babes cough and sputter and look alive. Removing umbilical cords and treating future belly buttons with strong iodine is also under my purview, though it seems I’m not the best at that in spite of my most expert baby-petting skills. When the births are unattended, the mama goats will bite down hard on the babies’ ears to spark a nervous response and get their blood flowing; that’s essentially what I do, but with vigorous patting instead.

We try to attend all of the births since our intervention sometimes means their survival: for one thing since it’s crucial on a farm business not to lose any producing animals, and for another because everyone loves the goats (except Joe! He is a pest!). Two days ago, for instance, my new favorite little white goat tried to come out at a physically impossible birthing angle—hip first with the leg bent back. After hours of tremendous exertion, mama Snow White looked about ready to call it quits, so Jen jumped in to manually turn the baby goat the right way and make way for her and the two brothers who followed; if we hadn’t been there, it’s likely that the traffic jam would have killed some or all of the goats. Those are terribly high-stress moments for the animals and people both, but luckily the occasion for our intervention is rare. Even so, we try to stand by through all the births, which means many pen-watching all-nighters are in our future!

We also get to feed the babies, which is pretty much the sweetest, stickiest, and most adorable job. We lightly pasteurize all of the moms’ milk to avoid passing on any illnesses the farm might not know about, then three times per day we bottle-feed the babes from sanitized beer bottles filled with pudding-thick milk; it’s also our duty to pet them as much as possible during this time to encourage positive socialization. Goats are naturally social and super curious creatures, so what this translates to is the babies crawling all over us in a big fuzzy puddle while we try to rub them silly. So far we have 15 wee ones from seven mamas, and there are about 20 who’ve yet to give birth. Needless to say, we’ll soon be swimming in a herd of squawking baby Nubians, which is totally cool by me; it will be an absolute miracle if I end up goat-free at the end of the month.

This might be a baking blog and all, but I just wanted to share a little about what it is that I’m doing up in Maine again! After spending a super intensive season making cheese and learning more and more about milks and animals last year, I wanted to be up here to bookend the experience and help the farm start the spring. And while I have a lot of baking plans in store while I’m here (bourbon! rhubarb! coconut!), there will likely be a lot of baby goat realness thrown in along the way. So thanks for reading and supporting this adventure. I hope you accept payment in the form of baby animal photos and videos. Oh, and don't forget to click those photos in the middle to embiggen!


April 7, 2013

Blueberry Whoopie Pies with Lemon Cream Cheese Filling


Whoopie pies were strictly a summer treat when I was a kid. It sounds backwards, considering summer is the time for lighter, fresher fare—jumbleberry pavlova, anyone?—but summer was when my family made its annual, magical pilgrimage to Maine, and along with sleep-away camp and fireworks, whoopie pies were the quintessential New England privilege. Even as a tried-and-true popsicle kid, I couldn’t resist the whoopie pies with their deep black cookies and bright white ropes of filling two fingers thick, beckoning from the counter at Day’s General Store in Belgrade Lakes. I’d poke at the tops through the plastic wrap, and was indulged especially on afternoons when my mom needed a sugar-chomping partner in crime. More than two decades later, the enormous, classic whoopie pies at Day’s are as insistent as ever.

Much regional ink has been spilled as to the origin of whoopie pies—there’s a cute story about Amish farmers yelling “Whoopie!” whenever they discovered the treat in their lunch pails—and a few years ago the Maine legislature considered adopting the cake as its official state dessert, but relegated it instead to just the official state “treat” (blueberry pie made with Maine blueberries is the official “dessert”). On behalf of the Pennsylvania Dutch, Lancaster County also took up the cause, claiming the whoopie pie originated within the traditions of Amish families. Whatever its true origin, the whoopie pie has a special place in my heart as part of a beloved Maine history, so I was more than jazzed to make this blueberry version on the farm over the weekend—it's a sort of ode to welcome returns. Plus, with that pudgy mound of filling in the center, this makes for a perfectly Maine-ish and delicious pre-summer treat. Enjoy!

And if you're interested in following along as I play midwife to baby goats this spring, check here for photos and updates...or just scroll all the way down. How could I resist!?


Blueberry Whoopie Pies
Adapted from the Food Network, of all places

1 1/2 cups all-purpose flour
1/2 teaspoon baking powder
1/2 teaspoon fine salt
1/4 teaspoon baking soda
5 tablespoons unsalted butter, softened
2/3 cup granulated sugar
1 teaspoon vanilla extract
1 large egg
1/3 cup buttermilk
3/4 cup blueberries

1. Whisk the flour, baking powder, salt and baking soda in a medium bowl. Beat the butter, sugar and vanilla on medium-high speed in a stand mixer fitted with the paddle attachment until light and fluffy, about five minutes. Beat in the egg until combined, scraping down the bowl. Reduce the mixer speed to low and beat in the flour mixture and milk in three
alternating batches, starting and ending with the flour. Fold in the blueberries with a rubber spatula.

2. Line two baking sheets with parchment paper, then coat with cooking spray or lightly grease with butter. Use a tablespoon or small ice cream scoop to scoop mounds of batter onto the sheets, spacing them each about two inches apart. Chill the batter in the fridge (or outside if it’s real cold!) for at least a half-hour; this helps the cakes stay round and puffed.

3. Bake until the halves are lightly golden, rotating the pans halfway through, 10 to 12 minutes; be careful not to overbake. Let cool on the pans for five minutes, then transfer to a rack to cool completely.

Lemon Cream Cheese Filling
Adapted from Baked Explorations

If lemon isn't your thing, just omit the zest and juice to get a straight-up cream cheese filling. You could also go for orange or add a bit of maple syrup for a sort of pancake experience, but we did enjoy the lemon.

4 ounces cream cheese, softened
4 tablespoons unsalted butter, softened
1 1/2 cups powdered sugar, sifted
1/2 teaspoon vanilla extract
Pinch salt
1 teaspoon lemon zest, optional
1 teaspoon lemon juice, optional

1. Beat the butter in or with an electric mixer until it is completely smooth, with no visible lumps. Add the cream cheese and beat until combined. Add the sifted confectioners’ sugar, vanilla, salt, and lemon zest and juice, if using. Beat until just smooth.

2. Turn half of the cooled cookies upside down (flat side facing up). Use an ice cream scoop or a tablespoon to drop a large dollop of filling onto the flat side of the cookie. Place another cookie, flat side down, on top of the filling. Press down slightly so that the filling spreads to the edges of the cookie.

3. Repeat until all the cookies are used. Put the whoopie pies in the refrigerator for about 30 minutes to firm up before serving. The whoopie pies will keep for up to three days, on a parchment-lined baking sheet covered with plastic wrap, in the refrigerator.


We'll be keeping them in the house until enough kids are born such that they can keep each other warm during the day and throughout the night. Until then: ridiculous indoor photos!

April 5, 2013

Applesauce Carrot Date Bundt Cake with Cream Cheese Glaze


The countdown to baby goats has begun. It seems that farms the world over have long since welcomed their lambs and kids, but my experience is that Maine is generally a month or two behind the times, considering its winter. The snow won’t melt until May, rhubarb and asparagus won’t peek out until June, and our baby goats are holding steady until...well, any second now, really. April finds me back here on the farm to finish what I started, that being helping goats knock hooves back in November in the name of springtime babies. I know things ‘round these parts have been a touch quiet as of late, but I hope to soon enough inundate you with photos of fluffy, tiny, tail-wagging kids. In the meantime, my final days down south(er) were a torrent of buddies, travel, and a rekindling of my lifelong love of Bundt cakes. There are a few more waiting in the wings, but this carrot cake is one of the handful of recipes that I’ve authored, so I’m pretty pumped to share it with you! It’s chock full of carrots and dates, and if nuts are your thing, well go ahead and add a cup of chopped pecans too. It might not be the quintessential seasonal dessert, but it’s perfectly delicious for sitting around waiting for kid goats and springtime to finally rear their heads.


Applesauce Carrot Date Bundt Cake
This makes a really tender cake. I enjoyed it best from the fridge with a mug of coffee, but still warm from the oven was mighty fine too. Serving carrot cake without cream cheese is practically sacrilege to many folks, including my main dude, but I prefer cinnamon and powdered sugar dusted on top. If you’re like that too, just sift a combo of the two with a pinch of salt over the cake; otherwise, get down with your cream cheesy self!


2 cups all-purpose flour
2 teaspoons baking soda
2 teaspoons baking powder
2 teaspoons ground cinnamon
1 teaspoon ground ginger
1/2 teaspoon freshly grated nutmeg
1/4 teaspoon ground allspice
1 teaspoon fine-grain sea salt
3 large eggs
1/4 cup granulated sugar
1/4 cup light brown sugar
1 cup unsweetened applesauce
2/3 cup safflower or vegetable oil
3 cups grated carrots
10 Medjool dates, pitted and chopped

1.  Grease and flour a 10-cup Bundt pan, and set oven to 350 degrees F. In a medium bowl, sift all the dry ingredients; set aside. In a large bowl, whisk the eggs with the sugars until fluffy and paler in color, about three or four minutes. (In my experience, this step is essential to getting the Bundt to crisp on the the outside, so don’t skimp.) Whisk in the applesauce and oil, followed by the carrots. Stir in the chopped dates, breaking them up with your fingers to spread them through the batter as much as you can.

2.  In two parts, mix the dry ingredients into the wet. Pour the batter into your prepared Bundt pan, and bake for about 45 minutes, or until a cake tester inserted into the middle comes out clean. Let cool in pan for 15 minutes, then turn out onto a cooling rack and allow cake to cool mostly or all the way before glazing. This is a moist cake and will keep for about three days at room temperature, longer in the fridge.

Cream Cheese Glaze
4 ounces cream cheese
1/2 cup powdered sugar, or more to taste, sifted
2 teaspoons vanilla extract
Pinch salt
5 to 6 tablespoons milk

1.  Beat cream cheese in a medium bowl until smooth and fluffy. Beat in sugar, followed by vanilla, and mix until smooth. Add the milk a tablespoon or so at a time until you have a thick but pourable glaze. Taste for flavor. I prefer my glaze on the less sweet side, but you can always add more sugar and thin it with more water as needed. Pour frosting along the top of cake, and use a knife to nudge it over the edge and down the sides. Voila!